
Adding blog functionality to a static Eleventy (11ty) website
Last modified February 18th 2022 |
![]() Source Code [GitHub]
|
#eleventy
Source Code [GitHub]
|
#eleventy
In a previous tutorial we covered setting up a simple site with Eleventy. This article will show you how to add blog functionality (display a list of posts in reverse chronological order).
Let’s get started by creating a project folder and installing Eleventy if you haven’t already done so by running the following commands:
mkdir eleventy-blog
cd eleventy-blog
npm init -y
npm install --save-dev @11ty/eleventyCode language: plaintext (plaintext)
Next we’ll setup the default layout file by creating an _includes folder with a default-layout.njk file:
---
title: Eleventy Blog
---

<!doctype html>
<html lang="en">
  <head>
    <meta charset="utf-8">
    <meta name="viewport" content="width=device-width, initial-scale=1.0">
    <title>{{ title }}</title>
  </head>
  <body>
    {{ content | safe }}
  </body>
</html>Code language: HTML, XML (xml)
Each of the blog posts will be saved as a individual markdown file in a folder called blog.
Here is an example of a blog post markdown file for reference saved as /blog/hello-world.md:
---
layout: default-layout.njk
tags: ['blog']
title: Hello World
date: 2020-01-01
teaser: This is the first blog post titled "Hello World"!
---

# Hello World

This is the first blog post!Code language: PHP (php)layout:– Specifies the layout file to be used.tags:– Creates a content collection with all other files that also contain ablogtag.title:– Displayed in the list of blog posts we’ll create next and in the<title>tag.date:– Will be used to sort the blogs posts from newest to oldest.teaser:– Optional short teaser text that will be displayed underneath the title in the blog feed.
Blog posts can also be created in HTML markup instead of markdown if you prefer /blog/hello-world.html:
---
layout: default-layout.njk
tags: ['blog']
title: Hello World
date: 2020-01-01
teaser: This is the first blog post titled "Hello World"!
---

<h1>Hello World</h1>

<p>This is the first blog post!</p>.Code language: JavaScript (javascript)
Now we can create a index.njk file that will load our collection of blog posts:
---
layout: default-layout.njk
pagination:
  data: collections.blog
  size: 10
  alias: blog
---

<ul>
  {%- for post in collections.blog | reverse -%}
    <li>
      <h3><a href="{{ post.url | url }}">{{ post.data.title }}</a> | {{ post.date }}</h3>
      {% if post.data.teaser %}
        <p>{{ post.data.teaser }}</p>
      {% endif %}
    </li>
  {%- endfor -%}
</ul>Code language: JavaScript (javascript)data:– Get’s all posts in the blog collection (tags: ['blog']).size:– Limits the number of blog posts displayed to 10.alias:– Used to construct the URL for individual blog posts e.g:/blog/hello-world/.
We can now run Eleventy and check that everything is working as expected:
npx @11ty/eleventy --serveCode language: CSS (css)In the browser you should see a list of the blog posts you created:
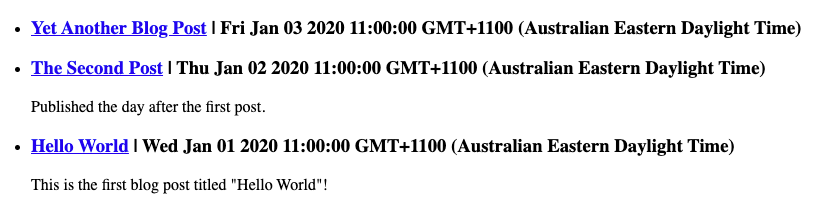
You’ll notice the date isn’t formatted in a way that is particularly easy to read.
To format the date in a more readable format we’ll install the eleventy-plugin-date plugin:
npm install --save-dev eleventy-plugin-dateWe then need to load the plugin in the config file .eleventy.js (create in root folder if you haven’t already):
const pluginDate = require("eleventy-plugin-date");
module.exports = function (eleventyConfig) {
  eleventyConfig.addPlugin(pluginDate);
};Code language: JavaScript (javascript)
Then change the date output in index.njk as follows and it will be displayed in a more readable format:
{{ post.date | readableDate }}Related Posts
#AD Shop Web Developer T-Shirts


