
Fetch & display data using the Airtable API and React
Last modified February 19th 2021 |
![]() Source Code [GitHub]
|
#react
Source Code [GitHub]
|
#react
In this tutorial we’ll be using Airtable as a data source for a simple React application. If you’re not familiar with Airtable they describe themselves as having the power of a database with the familiarity of a spreadsheet. If you know your way around spreadsheets you’ll have no troubles working with Airtable.
We’ll start with the Airtable setup before moving onto the code. Sign up for a new Airtable account if you haven’t already. Feel free to use this referral link and I’ll receive $10 in Airtable credit.
Airtable is quite simple to use so you may just want to import the data I used when creating this tutorial from here. Otherwise the steps involved in setting up the data are as follows:
- Create a new base (Airtable’s name for a database).
- Change the title and table name to recipes.
- Rename the first field (Name) to recipe.
- Delete the Notes, Attachments, & Status fields.
- Add new url & photo fields.
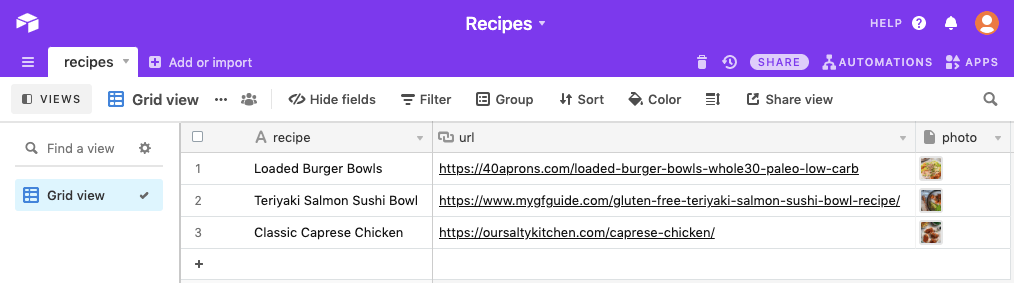
Here’s what my base looked like after being populated with some data:
We can now move onto creating the component to display this data in React. We’ll use Create React App to setup the development environment but this component can easily be dropped in an exiting application:
npx create-react-app react-airtableNext create a new Recipes.js file in the /src directory with the imports:
import React, { useEffect, useState } from "react";

const Recipes = () => {
  //...
  return (<div/>);
}

export default Recipes;Code language: JavaScript (javascript)
First up in the Recipes function we’ll define the variables for the useState Hook:
const [recipes, setRecipes] = useState({});Code language: JavaScript (javascript)We’l then use the Fetch API inside a useEffect Hook to retrieve the data:
useEffect(() => {
  fetch("https://api.airtable.com/v0/appM9q6JTxRolaNCN/recipes?api_key=YOUR_API_KEY")
    .then((res) => res.json())
    .then((data) => {
      setRecipes(data.records);
      console.log(data);
    })
    .catch((error) => {
      console.log(error);
    });
}, []);Code language: JavaScript (javascript)
To get the URL used in the fetch request you first need to generate an API key on the Account page, be sure to keep this secure. Next visit the API dashboard and select your base. Scroll to the “Authentication” section and copy the example query parameter.
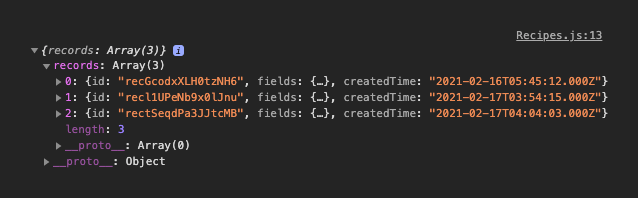
If the request was successful you’ll be able to see the data logged in the console:
With the data fetched and saved we can loop through each of the records and wrap the data inside some HTML markup. You could replace the “Fetching Data…” text here with an animated pre-loader for something more visually appealing:
return (
  <div>
    {recipes.length > 0 ? (
      recipes.map((record) => (
        <a href={record.fields.url} key={record.id}>
          <img src={record.fields.photo[0].url} alt={record.fields.recipe} />
          <p>{record.fields.recipe}</p>
        </a>
      ))
    ) : (
      <p>Fetching Data...</p>
    )}
  </div>
);Code language: JavaScript (javascript)
Finally load the component by modifying App.js as follows:
import "./App.css";
import Recipes from "./Recipes";

function App() {
  return (
    <div className="App">
      <header className="App-header">
        <Recipes />
      </header>
    </div>
  );
}

export default App;Code language: JavaScript (javascript)
That’s all for this tutorial. Although this project was very basic it serves as a solid foundation for building more complex applications using React & Airtable. If you want to see the full capabilities of Airtable browse the pre-built templates for inspiration.
Related Posts
#AD Shop Web Developer T-Shirts


